Learn how to easily make the best bottom round roast recipe. This tender rump roast makes a great Sunday roast for family dinners, and the leftovers are perfect for roast beef sandwiches.
Bottom Round Roast
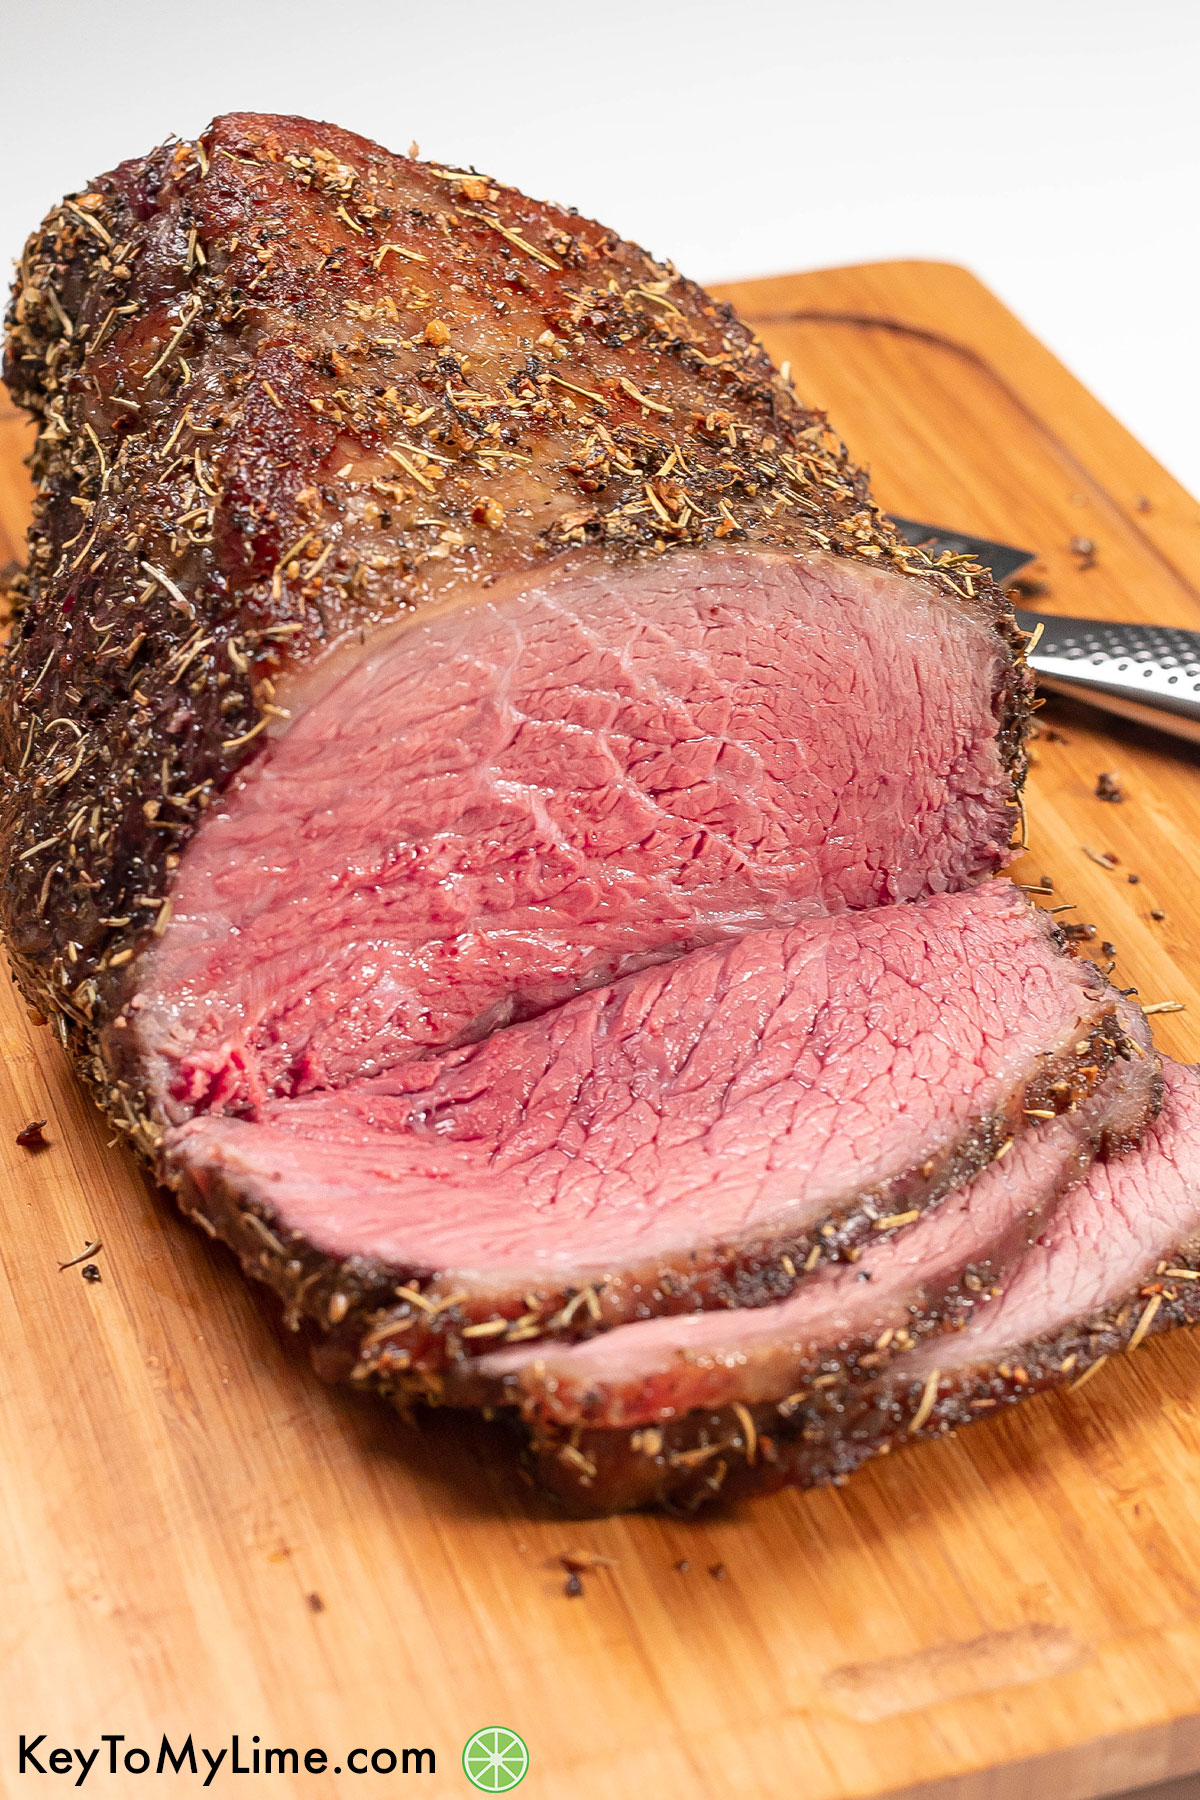
If you’ve never made this tender beef bottom round roast recipe before, you seriously don’t know what you’re missing! This melt-in-your-mouth roast beef is perfect for a Sunday roast dinner with the family, and the leftovers make delicious roast beef sandwiches.
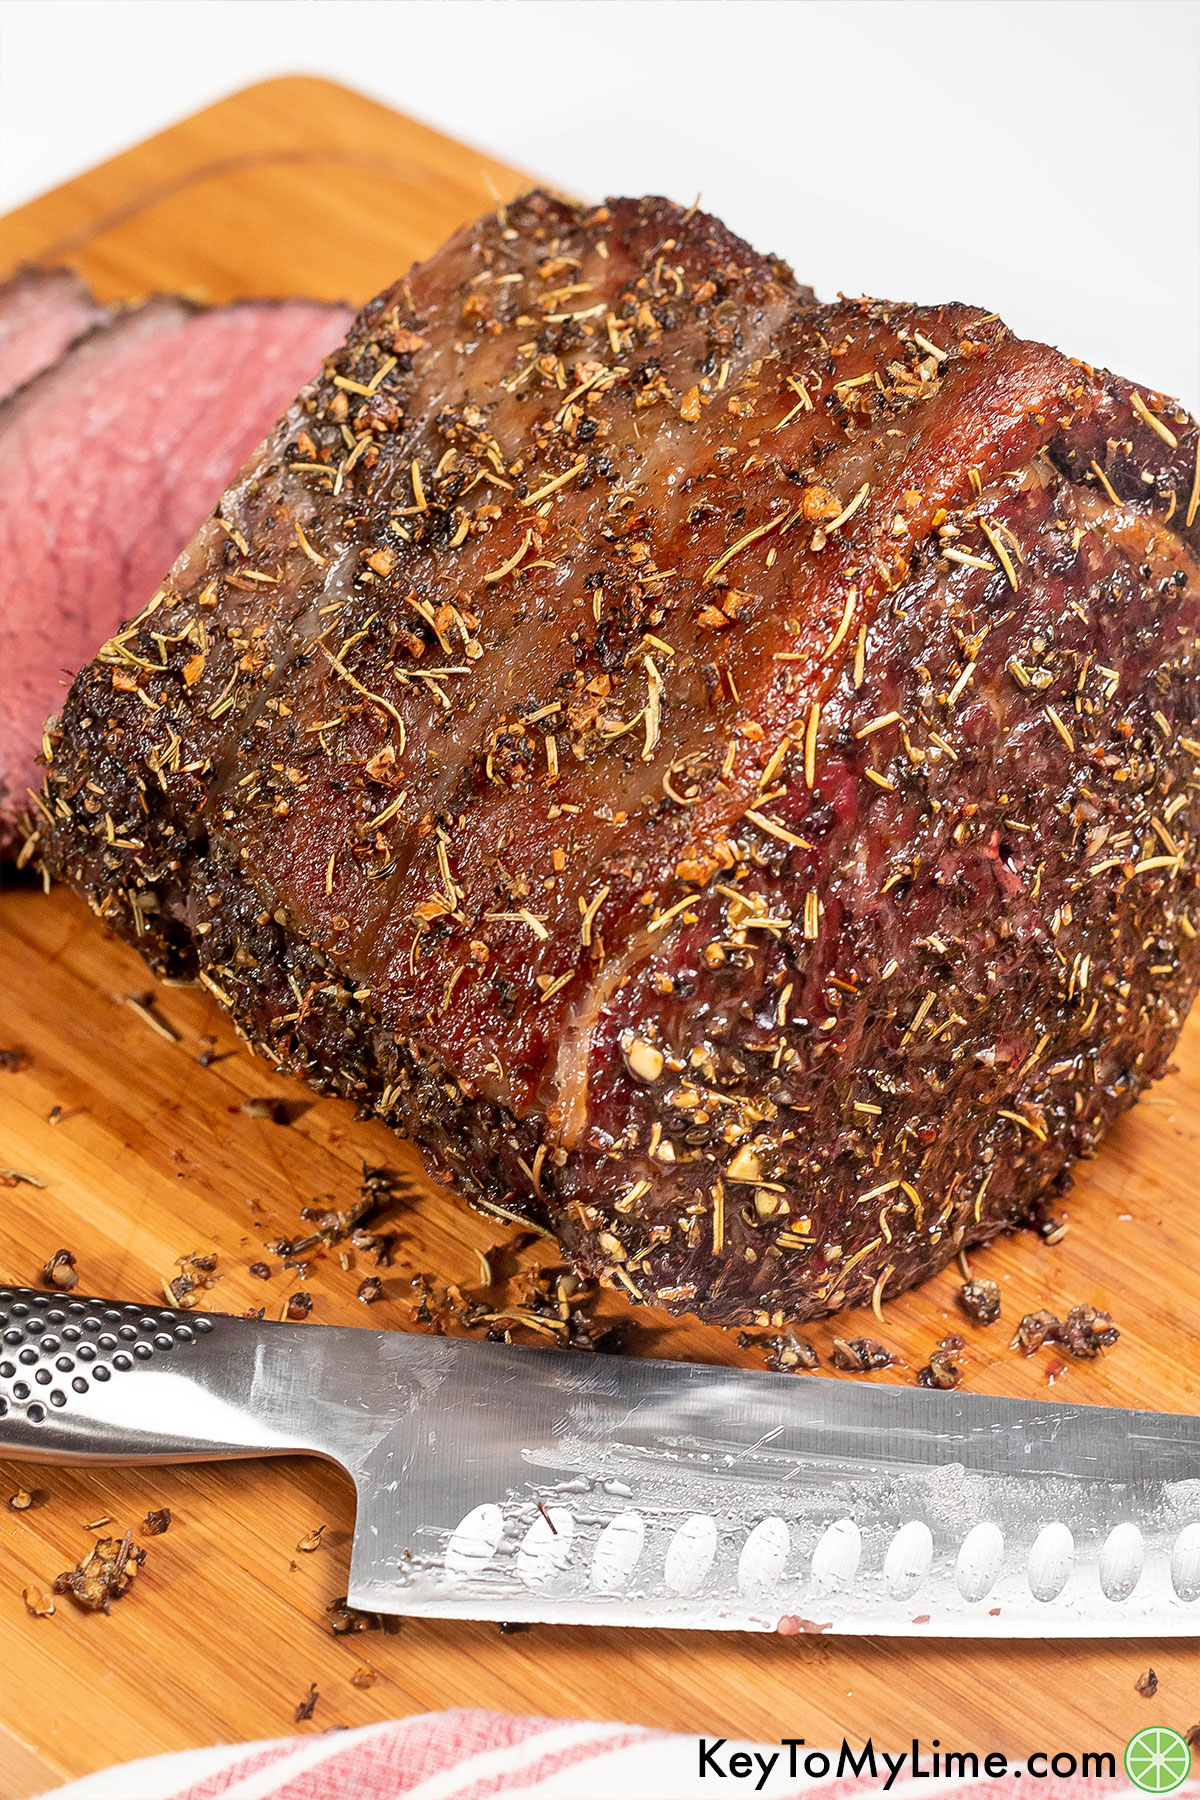
I love a great Sunday roast, and this easy recipe for a tender bottom round rump roast has become my go-to dinner idea for those cozy family gatherings. The beef is seasoned with a dry rub made from a blend of dried herbs, garlic cloves, salt, and pepper. It infuses the meat with such an incredible flavor and makes the tastiest bark.
Rump roast is perfect for preparing a satisfying and delicious meal that doesn’t break the bank. It’s a lean and budget-friendly cut of beef that is perfect for slow roasting, resulting in a tender and flavorful dish that’s perfect for family dinners or special occasions.
Serve it with some garlic herb butter, Zip sauce, or horseradish, and you can even use beef broth to create a delicious au jus recipe.

Ingredients
Bottom Round Roast: Bottom round roast is a lean and flavorful cut of beef. It has a nice balance of meat and fat, which results in a tender and juicy roast when cooked properly. This cut is relatively affordable compared to other cuts of beef. Although it can be tough due to the lack of marbling, proper cooking methods and slicing it thinly can yield tender results.
Garlic: Fresh minced garlic provides an intense, aromatic flavor that penetrates the meat during cooking. Garlic is essential in creating a savory, well-rounded seasoning that enhances the natural flavors of the beef. Opt for fresh garlic bulbs, which should feel firm to the touch with dry, tight skins.
Oregano, Thyme, and Rosemary: These herbs have complementary flavor profiles and they all have an ability to withstand the high heat of roasting. Oregano adds a robust, earthy taste, while thyme contributes a subtle, lemony note. Rosemary imparts a piney, aromatic flavor that pairs exceptionally well with beef.
Kosher Salt: Kosher salt is used to bring out the natural flavors of the meat. It’s less processed than table salt and its larger, coarser grains distribute more evenly, leading to a more balanced flavor. For the best results, season your roast with kosher salt well in advance, allowing it to penetrate the meat and enhance its flavor.
Coarse Black Pepper: This adds a pungent, mildly hot flavor that gives the roast a bit of a kick. Coarse black pepper provides a stronger flavor and more texture than finely ground pepper. It tastes the best when you freshly grind your own black pepper.
Olive Oil: Olive oil is used to coat the roast before cooking, which helps to lock in the juices and creates a beautiful, crispy exterior. A quality extra virgin olive oil is best as it adds a subtle fruity flavor. Not only does it enhance the taste, but olive oil also allows the surface of the roast to cook evenly, leading to a perfect crust. It also helps the seasoning adhere to the meat. The oil’s mild flavor complements the herbs and spices without overpowering them.

Ingredient Variations
Herbs: Feel free to experiment with other herbs such as basil, marjoram, or sage in place of or in addition to the oregano, thyme, and rosemary.
Spice It Up: Add a touch of heat by incorporating crushed red pepper flakes or cayenne pepper to the seasoning mix.
Mustard: Adding Dijon or whole grain mustard to create a seasoning paste can provide an extra layer of tanginess and depth of flavor.
How To Cook A Bottom Round Roast
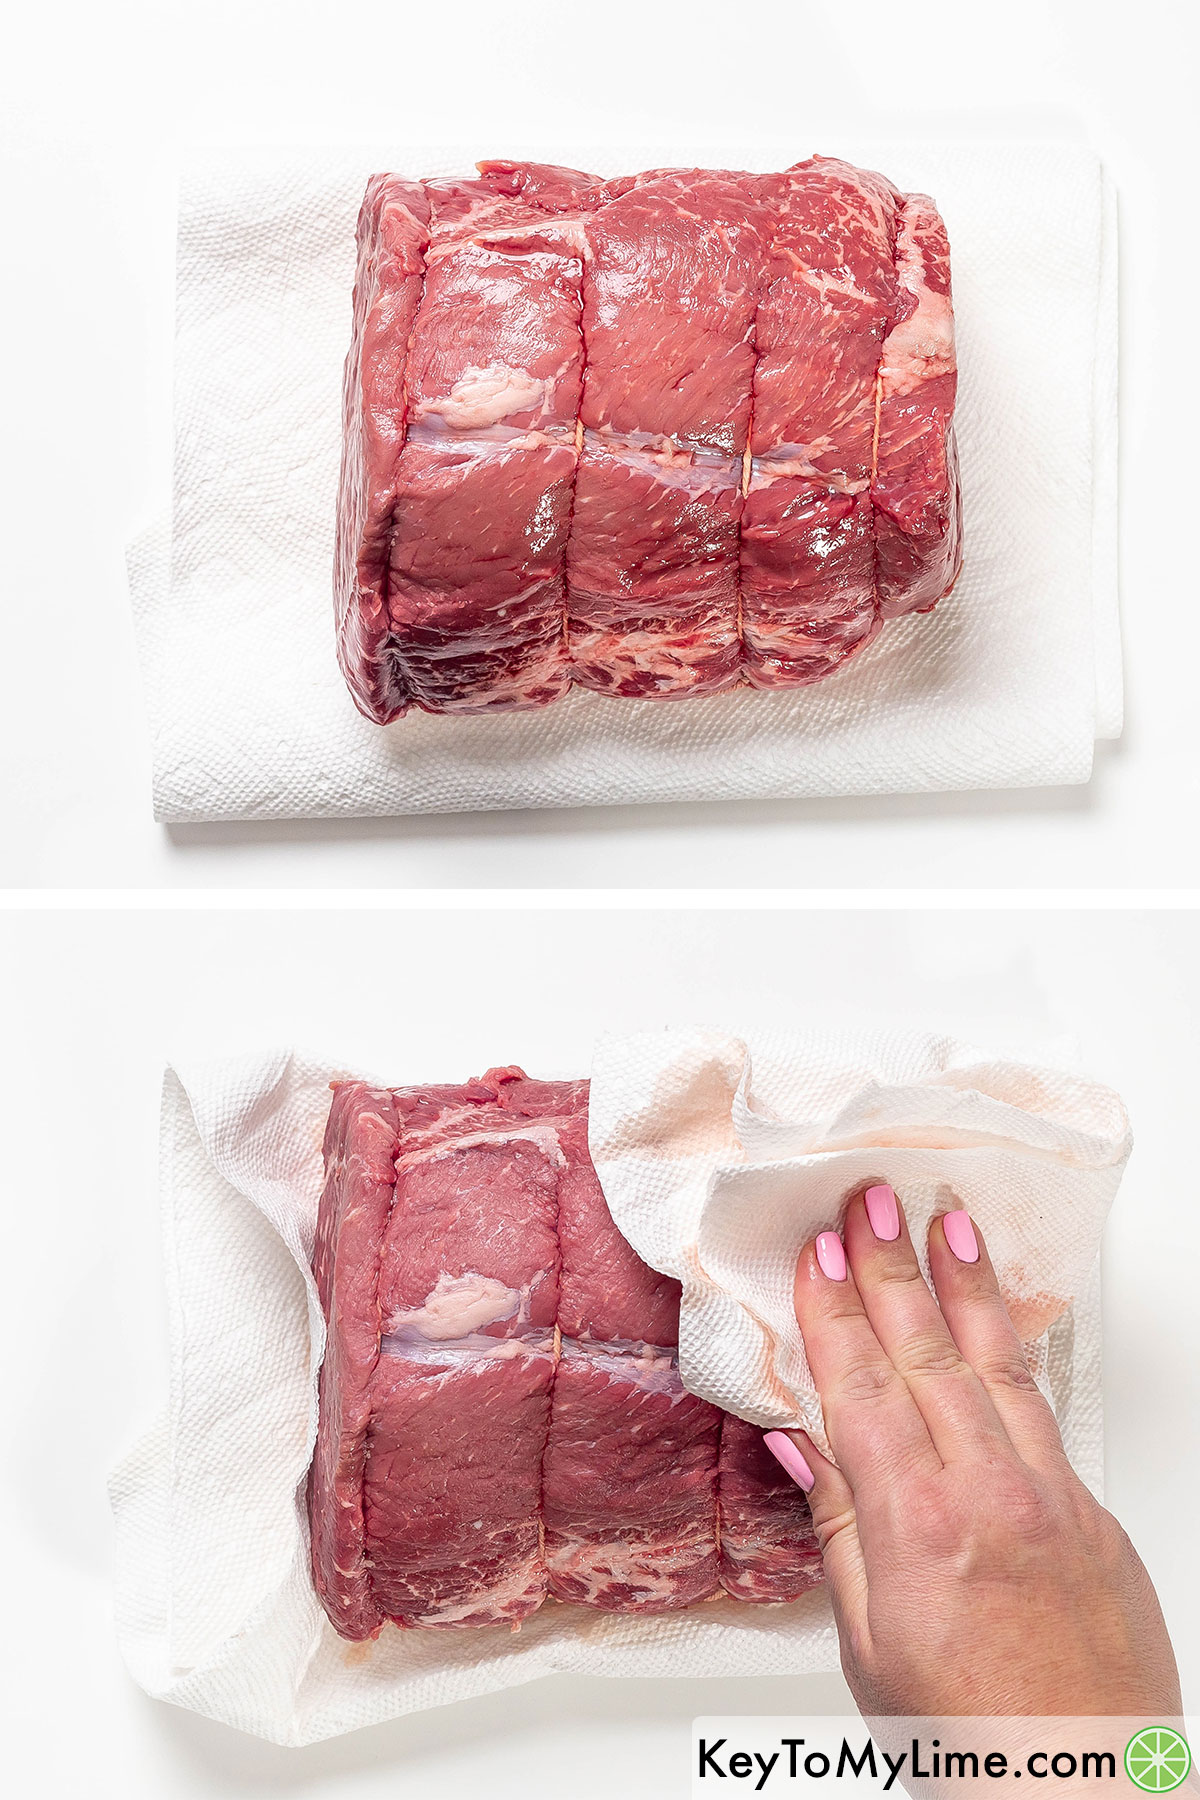
Prepare the roast: Start by placing a roast onto a layer of paper towels and patting the roast dry with paper towels to remove the moisture. (See the recipe card below for the full printable instructions.)
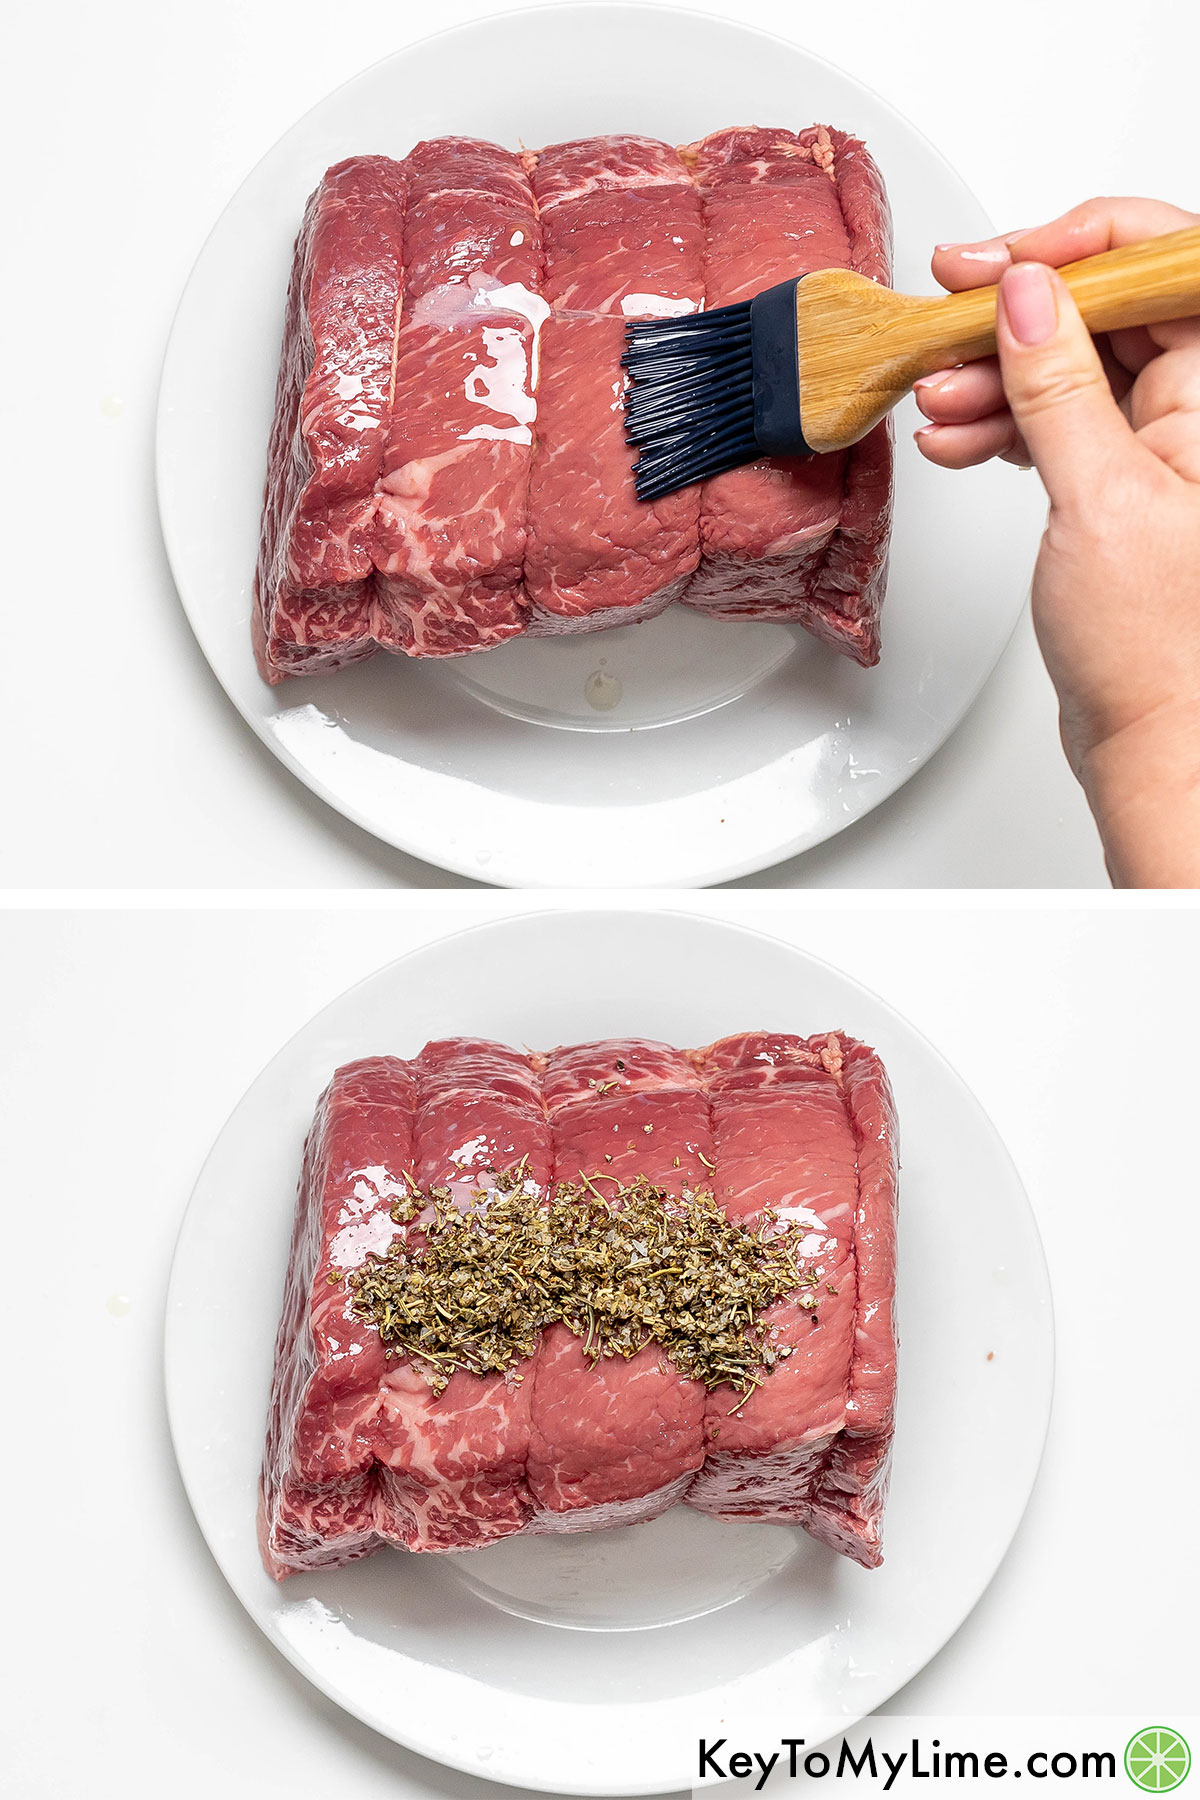
Creating the rub: mix the garlic, thyme, rosemary, oregano, salt, and pepper in a small bowl. Brush the roast with olive oil and rub the seasoning blend onto the meat.
Cover and refrigerate: Using your fingers spread and massage the seasonings into the roast until fully covered. Once fully covered place the roast uncovered (see notes)* in the fridge for 6 hours.

Preheat the oven: Remove the roast from the fridge and let it sit at room temperature for 30 minutes before baking. Preheat the oven.
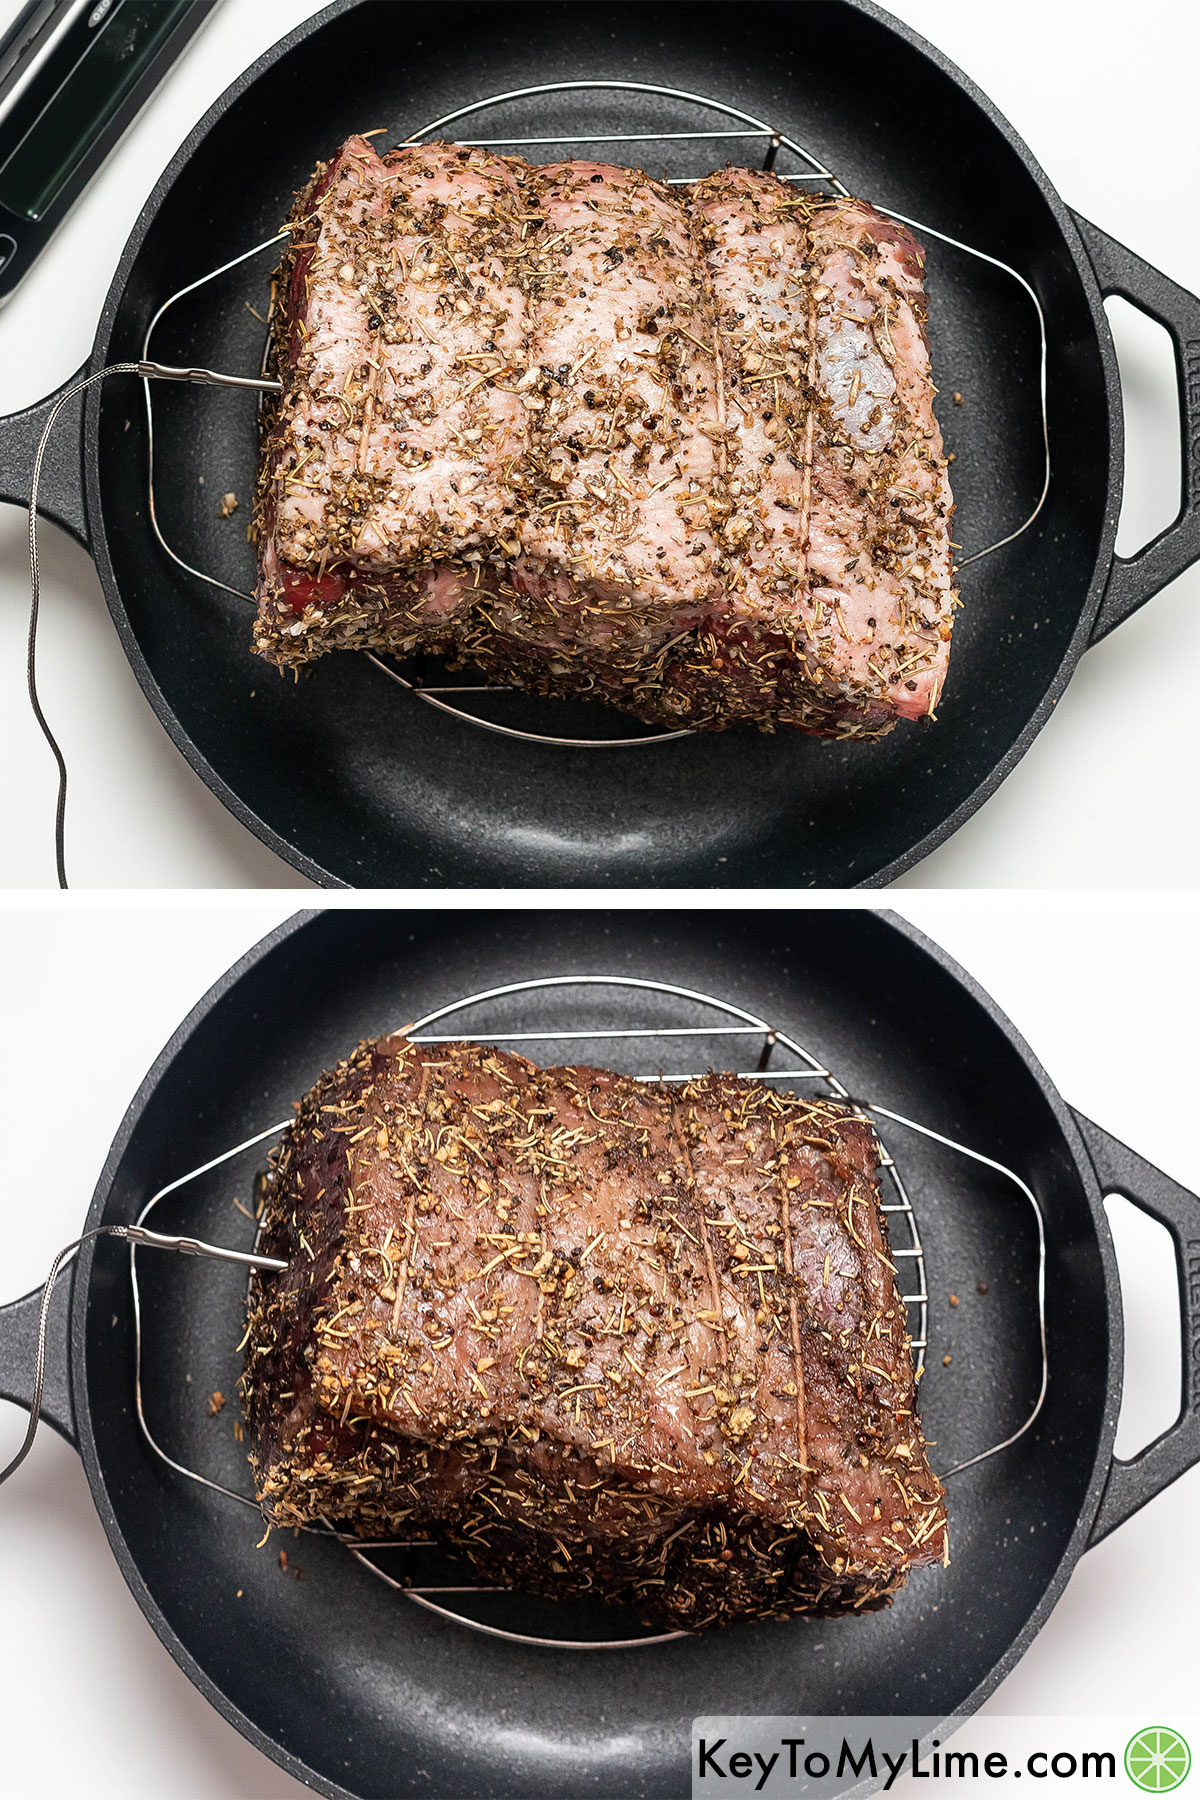
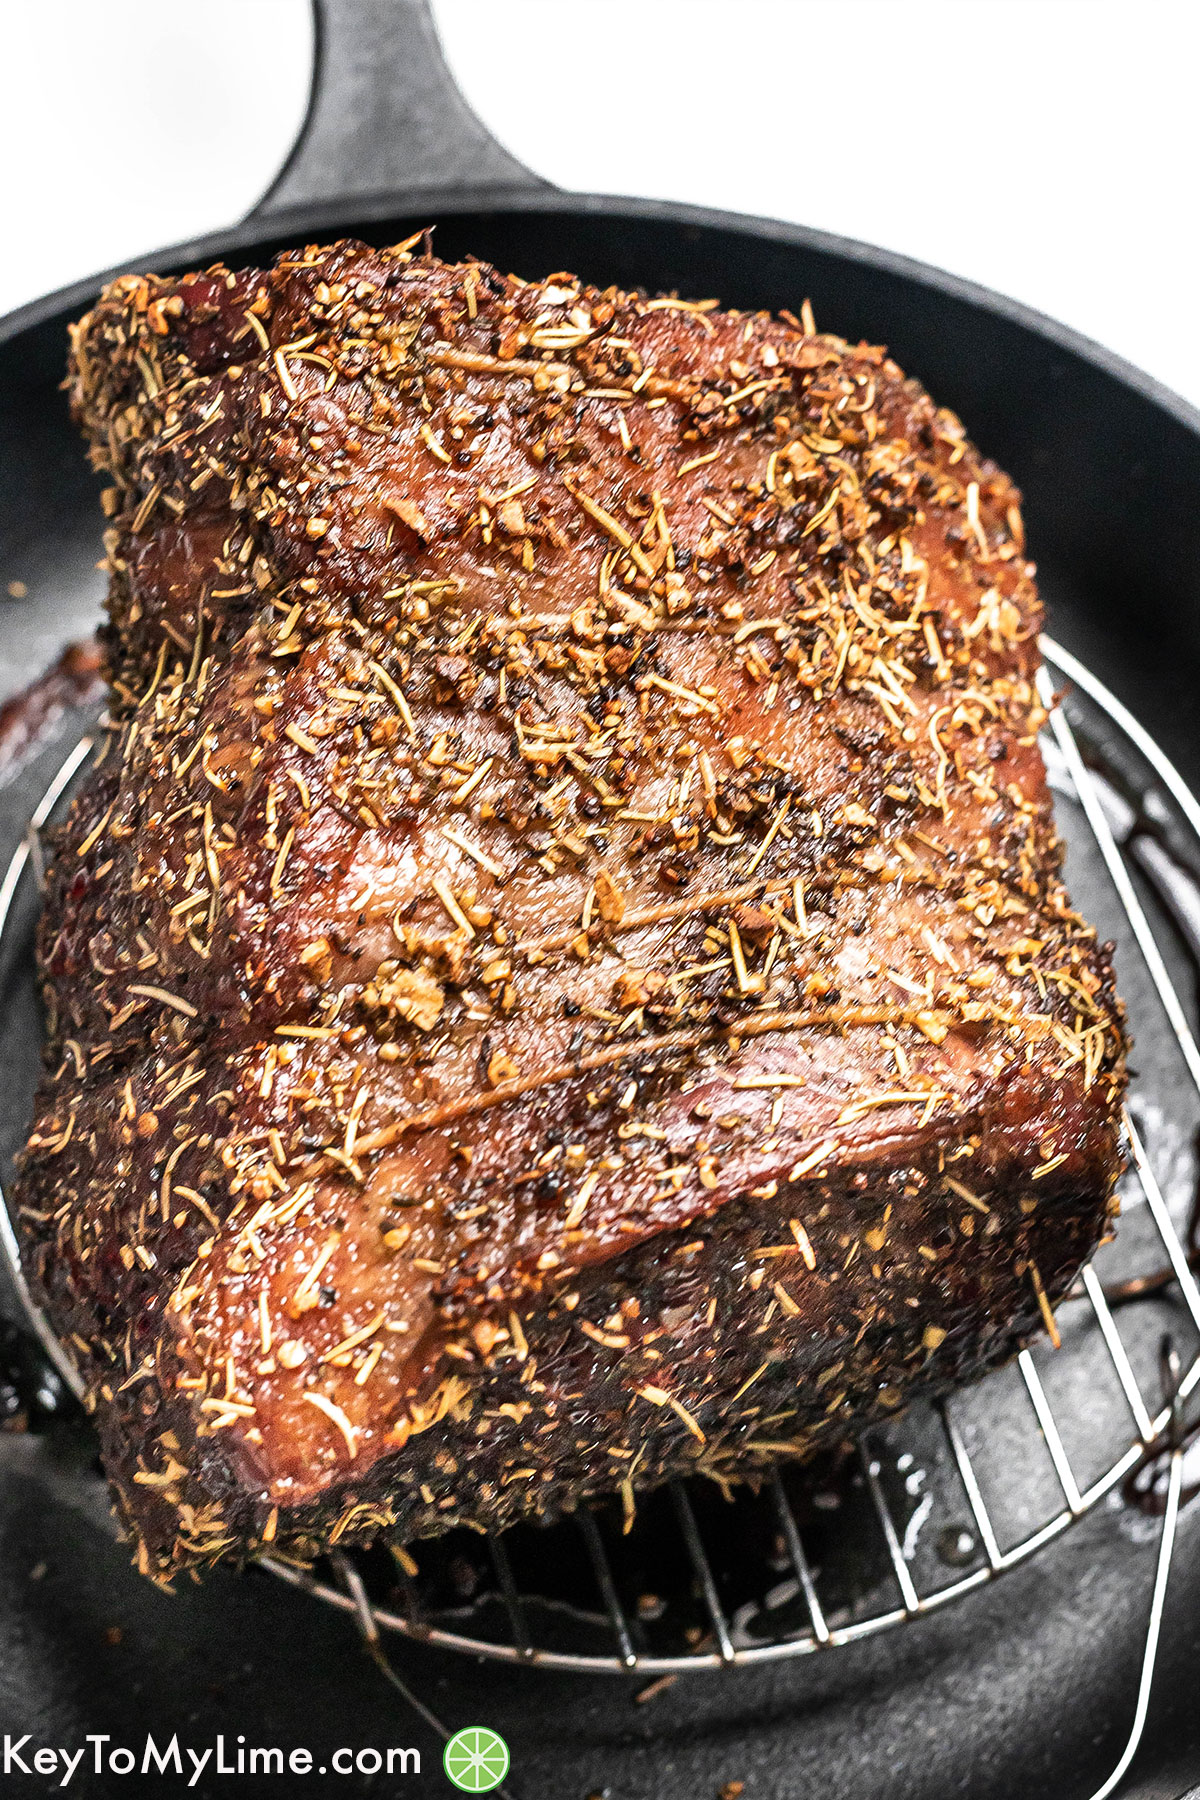
Cook the roast: Place the roast on a wire rack or trivet in a large cast iron skillet or roasting pan. Insert an oven-safe thermometer into the roast and bake until it reaches your desired doneness level.
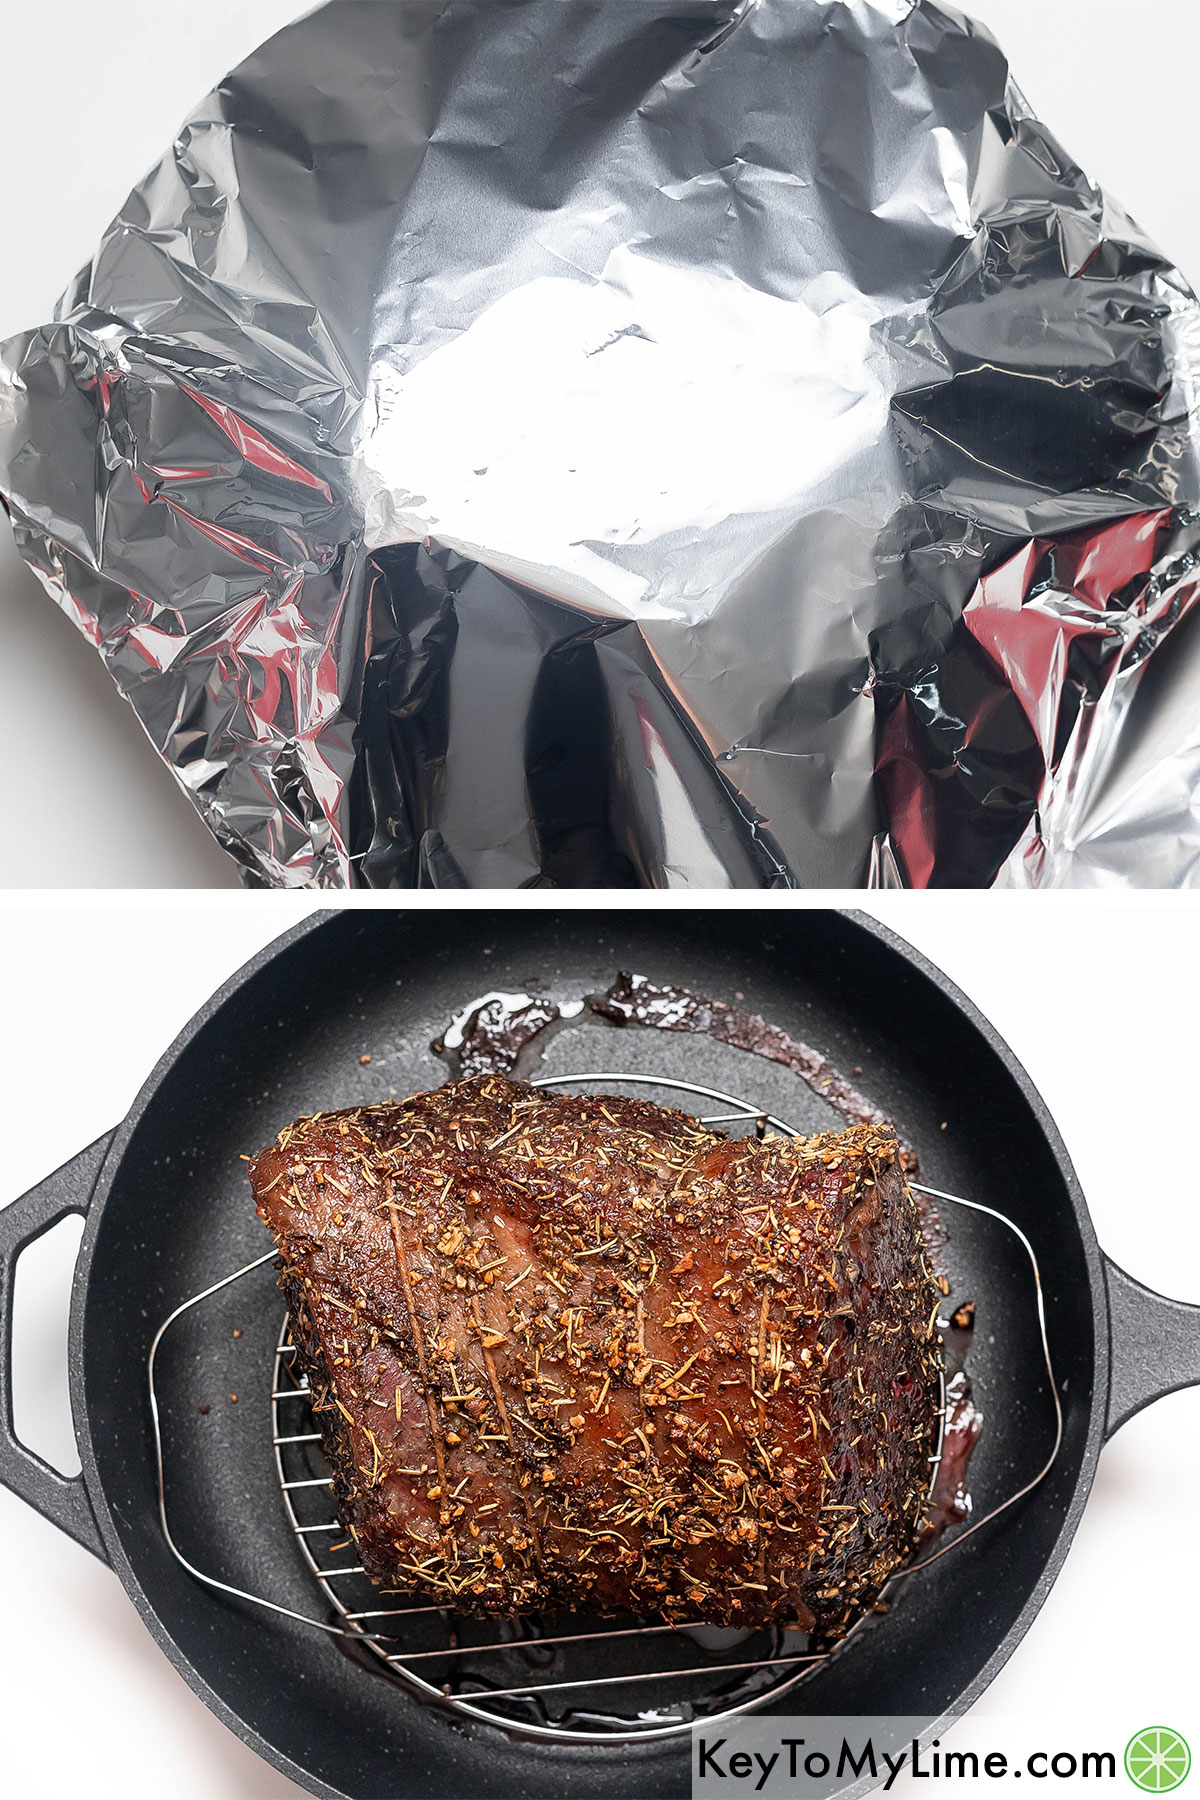
Resting the roast: Tent the roast with aluminum foil when it’s out of the oven and let it rest. After it rests, reverse sear it at a high temperature in the oven until a beautiful golden brown crust forms. See the recipe card below for the full written instructions, including ingredient amounts, cooking times, and helpful tips, etc.
Pro Tips
Allow the roast to rest at room temperature for 30 minutes before cooking. This will help the meat cook more evenly and result in a juicier roast.
Use a meat thermometer to ensure the roast reaches the desired level of doneness. This will prevent overcooking or undercooking your roast.
Allow the roast to rest for 10-15 minutes after cooking. This will help the juices redistribute throughout the meat, resulting in a more tender and flavorful roast.
Should Rump Roast Be Covered Or Uncovered?
For cooking, it’s best to bake the roast uncovered until it reaches your desired doneness level. Cooking it uncovered allows the exterior to develop a flavorful crust or “bark” while roasting. Once you pull it out of the oven, tent it tightly with aluminum foil to give the meat a chance to reabsorb the juices and prevent it from drying out when slicing.
It’s really up to your preference though. Rump roast can be cooked both covered and uncovered, depending on your desired outcome. If you want to ensure that the roast stays moist and tender, you may choose to cover it with aluminum foil, especially during the last half of the cooking process. Covering the roast can help retain moisture and reduce the risk of drying out the meat.
It’s best to let the roast rest in the fridge uncovered, allowing the surface to dry out a bit, which will help it brown faster. It will also lessen the chances of a gray band under the crust. There is always a risk of cross-contamination when you store uncovered food in the fridge though. If you’re uncomfortable with storing it uncovered, wrap it in plastic wrap twice before placing it in the fridge to rest.
What Is A Bottom Round Roast Good For?
Rump roast is commonly used to make pot roast, and the leftovers are perfect for roast beef sandwiches. You can also cut it into cubes to use it as stew meat in dishes that will be cooked low and slow, like this Mulligan Beef Stew.
A bottom round roast is ideal for slow-roasting, braising, or slow-cooking methods that allow the meat to become tender over time. This cut is great for pot roasts, stews, and slow-cooked dishes like beef bourguignon. It’s also perfect for preparing large quantities of shredded beef for dishes like tacos, sandwiches, or pulled beef plates.
A bottom round roast is an excellent choice for slow-roasting or braising, as these methods help to break down the connective tissue and tenderize the meat. It is also well-suited for making roast beef sandwiches, as it can be sliced thinly and remains flavorful and tender when served cold.
Does Bottom Round Roast Get Tender?
While the bottom round roast is a lean cut with less marbling, it can still become tender if cooked properly. Using slow-cooking methods or roasting at low temperatures for an extended period helps break down the connective tissues in the meat, resulting in a more tender texture. Since this cut has the best texture when it’s cooked low and slow, the best temperature to cook it at is 275F. Additionally, slicing the roast thinly across the grain can significantly enhance its tenderness.
Does It Get More Tender The Longer You Cook It?
In general, cooking a bottom round roast for an extended period at a low temperature can help improve its tenderness. However, there is a point at which overcooking the roast can cause it to become dry and tough. It’s essential to monitor the roast’s internal temperature and cook it to the desired level of doneness (usually around 135F for medium-rare to 150F for medium) to ensure that it remains tender and flavorful.
The directions in this recipe give you the perfect results for sliced roast beef. If you want it to be fall-apart tender and shreddable, you would bake it at 300F for about 4 hours, flipping the roast halfway through the cooking time. If you want your roast to be shreddable, it needs to reach an internal temperature of 200-205F to make sure the fat renders and the connective tissue has a chance to break down. I personally like cooking it in the slow cooker or Instant Pot if I want it to be shreddable. Depending on how you season it, the shredded beef can also be perfect for tacos!
Other Names
Bottom round roast goes by a few different names depending on the region you live in. It’s commonly called a rump roast, standing rump roast (if it’s bone-in), round tip roast, boneless bottom round roast, or a bottom round oven roast. You can get this cut of meat from your local butcher, but I’ve also had good luck getting quality cuts of beef from Costco.
Alternative Cooking Methods
Slow Cooker: Place the seasoned roast in a slow cooker with vegetables, and cook on low for 8-10 hours or on high for 4-6 hours until the meat is tender.
Instant Pot: Sear the roast on all sides using the sauté function, then add vegetables and cook on high pressure for 20-25 minutes PER POUND (total time depends on the size of the roast). Allow for a full natural pressure release (this will likely take about 30 minutes) before opening the lid.
Side Dishes To Serve With It
My favorite sides to serve it with are creamy mashed potatoes, Crockpot green beans, skillet sweet potato cornbread, roasted baby potatoes, moist Jiffy cornbread, and baked mac and cheese with Velveeta.
Storage, Reheating, And What To Make With Leftovers
To store leftovers, place them in an airtight container and refrigerate for up to four days. When reheating, warm the slices in the microwave or in a skillet over low heat until heated through. Leftover roast beef is perfect for making roast beef sandwiches, sliders, or even a delicious French dip sandwich. You can also use the leftovers in a hearty beef and vegetable soup or toss them into a stir-fry.
How To Store Leftovers
Allow the leftover bottom round roast to cool completely before storing it in an airtight container or wrapping it tightly in aluminum foil. Store the roast in the refrigerator for up to 3-4 days. You can also freeze it for up to 3 months.
How To Reheat
To reheat your bottom round roast, preheat your oven to 250F. Place the roast in a roasting pan or baking dish and add a little beef broth to keep it moist. Cover the pan with aluminum foil and heat in the oven for 20-30 minutes, or until the roast is heated through.
Keep In Touch
I’d love to hear what you thought of this recipe in the comments or on Instagram! @KeyToMyLime #KeyToMyLime

Beef Recipes
If you like this recipe, be sure to check out all of our other roasted beef recipes. Some reader favorites are:
- Boneless Prime Rib
- Best Corned Beef with Homemade Spice Blend
- Instant Pot Frozen Roast
- Top Round Roast Beef
- Air Fryer Prime Rib
Perfect Bottom Round Roast Recipe (Rump Roast)

Easily make the best bottom round roast recipe. Tender rump roast makes a great Sunday roast or perfect roast beef sandwiches.
Ingredients
- 4 pound bottom round roast (or rump roast, for best results look for one that has an even shape and size)
- 4 cloves garlic (minced)
- 2 1/2 teaspoons dried thyme leaves
- 2 1/2 teaspoons dried rosemary
- 2 1/2 teaspoons dried oregano leaves
- 2 teaspoons kosher salt
- 2 teaspoons coarse black pepper
- 2 Tablespoons olive oil
Instructions
- Lay a few layers of paper towels onto a clean plate. Remove the roast from the fridge. Open the package next to the sink and drain off the excess liquid. Remove the roast from the packaging and place it on the paper towel lined plate. Use a few more paper towels to pat dry the entire roast. Once dried, remove the paper towels from the plate, leaving only the roast on it.
- To a small mixing bowl, add the garlic, thyme, rosemary, oregano, salt, and pepper. Mix using a metal spoon, while mixing use the back of the spoon to break up the rosemary.
- Brush the entire roast with olive oil, then evenly sprinkle the seasoning on all surfaces. Use your fingers to spread the seasoning blend around while gently massaging it into the meat.
- Optional: Once the meat is fully covered, place the roast in a dish uncovered (see notes)* in the fridge on the bottom shelf for 6 hours. I prefer the texture and flavor of the crust when I allow it to dry out a bit in the fridge, but it's delicious both ways. I've had great results even when I didn't have time for the herb rub to rest on the meat for any amount of time.
- Preheat the oven to 275F. Allow the roast to rest at room temperature on the counter for 30 minutes to remove the chill before baking.
- Place a wire rack or trivet in the bottom of a large cast iron skillet, shallow oven safe dish, or roasting pan.** Place the roast on the rack. If your roast has a fat cap, place it with the fat cap up. Insert an oven safe thermometer into the thickest part of the roast deep enough to reach the center, and place the roast in the oven.
- Bake the roast for approximately 45-55 minutes per pound (it will be closer to 45 minutes per pound for medium-rare and closer to 50-55 minutes per pound for medium). Begin checking the internal temperature with a thermometer 30 minutes before the roast should be finished cooking (since this is a low and slow method, times can vary based on oven models and specific roast shapes and sizes, see notes***).
- Before removing the roast from the oven, prepare a large piece of aluminum foil to tent the roast and trap the heat immediately after taking it out.
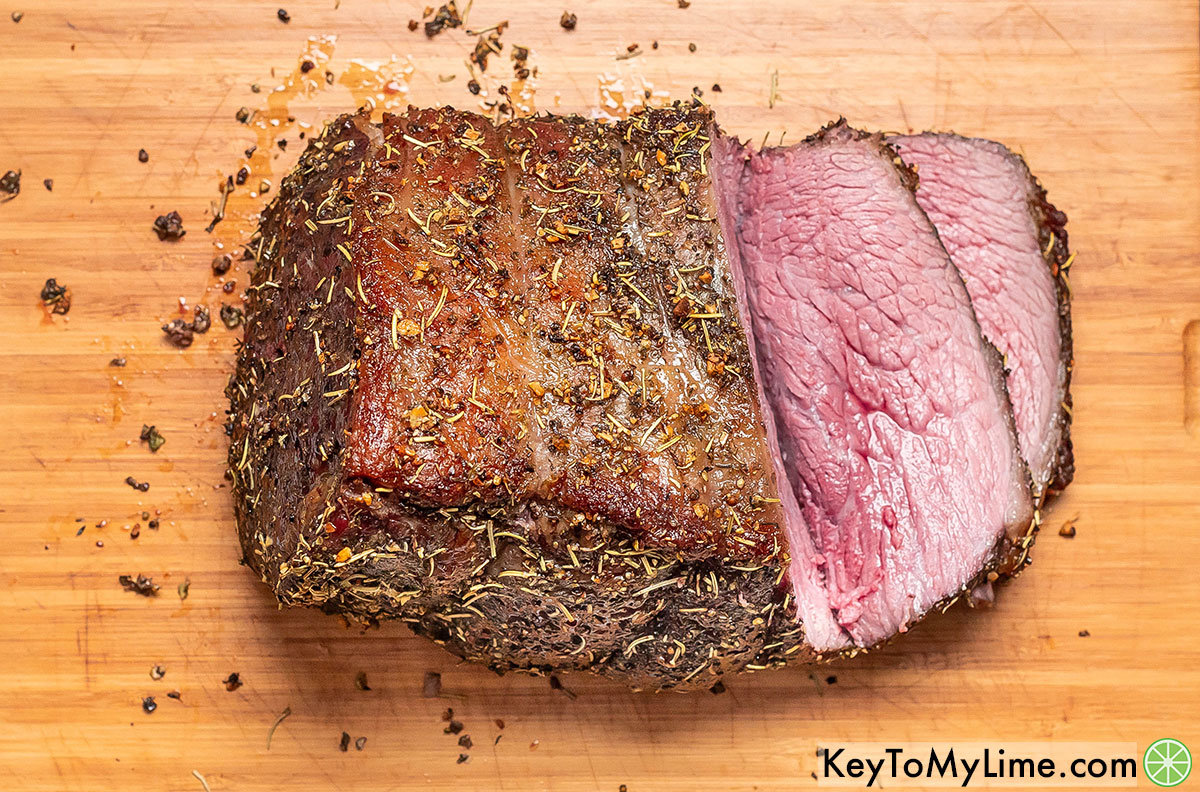
- For a medium-rare roast, remove it from the oven when it reaches 135F, and for a medium roast, remove it at 145F. Using a thermometer is very important. It is recommended to cook a beef roast to a minimum internal temperature of 145F, but individual preferences vary. The roast in the photos was cooked to 135F internally. Keep in mind that there is virtually no carryover cooking when you cook the roast at 275F, so pull it out at the internal temperature you'd like to eat it at. For other desired levels of doneness, refer to the notes provided****.
- Carefully remove the roast from the oven and tent the pan with aluminum foil. Turn the heat up on the oven to 450F and let the roast rest for 15-20 minutes.
- Remove the foil and thermometer from the roast, and place it back into the oven. Cook on high heat for 5-8 minutes, or until a beautiful crust forms on the outside.
- Carefully remove the pan from the oven and transfer the roast to a cutting board. Slice the meat against the grain and serve with desired sides.
Notes
*Letting the roast rest in the fridge uncovered allows the surface to dry out a bit, which will help it brown faster. It will also lessen the chances of a gray band under the crust. There is always a risk of cross-contamination when you store uncovered food in the fridge though, so if you’re uncomfortable with storing it uncovered, wrap it in plastic wrap twice before placing it in the fridge to rest.
**Using a shallow pan creates even airflow around the roast. This ensures no part of the roast gets cooked more than others, which creates the uniform beautiful color from top to bottom.
***Oven type and roast shape and size will greatly influence the cooking time when roasting low and slow. Conventional ovens can have uneven heat distribution, leading to hot spots and potentially slower or uneven cooking. Thicker cuts of meat take longer to cook because heat takes more time to penetrate to the center. Irregularly shaped roasts may have thinner and thicker sections, which can lead to uneven cooking. Cooking time doesn't always increase linearly with weight. For example, a 4-pound roast may take twice as long to cook as a 2-pound roast, but an 8-pound roast may not take twice as long as a 4-pound roast. A roast with a larger surface area will cook more quickly because more heat can be transferred to the meat at once. For example, a flattened or butterflied roast will cook faster than a compact, round roast. To account for these factors, it's essential to use a meat thermometer to monitor the internal temperature of the roast and ensure it's cooked to the desired level of doneness.
****For the different levels of doneness, these are the temperatures you’re looking for:
RARE: 125F
MEDIUM RARE: 135F
MEDIUM: 145F
MEDIUM WELL: 150F
WELL DONE: 160F
Nutrition Information:
Serving Size:
1/8Amount Per Serving: Calories: 400Total Fat: 13.7gCarbohydrates: 1.5gFiber: 0.6gSugar: 0gProtein: 68.1g
Nutrition information isn’t always accurate.
This bottom round roast is perfect for a Sunday roast, and the leftovers make amazing roast beef sandwiches. Give it a try, and I’m sure your family will love it as much as mine does.

14 thoughts on “Bottom Round Roast Recipe”
Made this roast was delicious and nothing left for roast beef sandwiches.
Good thoughtful recipe, mine is almost done now, but how about gravy?
Exchange pans for the last 8 minutes of browning?
Hi Chris, Thanks! This roast would be great with gravy. I used a cast iron skillet, so I didn’t need to exchange pans for the last 8 minutes of browning. Whether or not you need to exchange pans would depend on the type of dish you used. -Alexa
How long can I keep the encrusted roast uncovered in the fridge? Mine has to stay in for about 19 hours until I actually have time to cook it. (I just put it in at 3 PM, and I can’t cook it until about 10 AM tomorrow morning) I hope it’s okay. Maybe I should wrap it in plastic so the roast doesn’t dry out…?
Hi Kathi, You can store it uncovered in the fridge for up to 24 hours. After that, it may end up drying out too much. I hope that helps! -Alexa
I tried to do one last night, but tried to sear all sides before placing in oven, BIG MISTAKE because after I did, I put in my oven at 285 for 2 hours and it was medium well!! Ruined it! So if you like searing the beef, only do like 1 or 2 minutes at most to seal in. I seared maybe 2.5 to 3 min and it cooked it too fast. What a dumb mistake on my part. Should have checked after first hour.
What an awesome taste. However, even keeping a very close eye on the temp and took it out when it reached 135 and followed the rest of your instructions, it was still fairly chewy. As I said, it tasted great but just took too long to chew. I will try it again. Even though I used a bottom round roast, the next time I might try a different cut of meat.
Depending on how you cook it, bottom roast can be fairly tough. It really needs to be cooked low and slow like in a Crock pot. If not, you really need to pull it out at 120 (rare) and then finish. 135-140 is too much. This cut has very little marbling so is incredibly easy to dry out, regardless of how careful you may be. If it’s on the smaller/thinner side, even moreso will it dry out.
Another tip is to place multiple thermometers in the meat, ensuring an accurate reading. Also make sure your thermometer is calibrated correctly. Cheaper thermometers can be way off at times.
Hope this helps.
Mine, too! It cooked faster than I thought it would, but I used a meat thermometer the entire time to be sure I got it right (have one of those that dings like a microwave which is definitely what I need!!) Tasted great but, yes, chewy and somewhat dry…and totally gray! Not a hint of pink. Mine got a tad over 135, but not much. Like you, won’t try that cut again, but I only give a recipe 2 trys!
It sounds like you sliced it with the grain. How you slice it makes a world of difference. Also, I noticed that a lot of roasts in the meat case seem to have grains going in different directions which made me think I’d have to slice it in one direction up to a certain point, then turn it sideways and slice it from another direction.
Take it out at least 5 degrees before your desired temperature. I took mine out at 132 degrees, and it rose to 145 degrees while resting, so I couldn’t even put it back in for reverse searing. But it already had a nice bark on it anyway. It definitely does continue cooking when you cook at 275 degrees.
From all my experience and study for cooking meat, I’m left with two most important numbers: (1) Collagen starts to melt at 160 F. (2) Food safety starts at 165 F.
There is one facts of life from food chemistry: In meat, the muscle fibers are always tender. The only cause of tough meat is collagen not yet melted out. ‘Juicy’ meat is from the melted collagen. Cooking meat much over 180 F will cause the proteins to ‘unwind’, expel their water, and become hard, dry, like charcoal. So cook meat to 165 F to 180 F. Of course, the temperature is the ‘internal’ temperature of the meat and to be measured by an accurate, appropriate thermometer; there is a tube, and its end should be in the ‘center’ of the meat. The oven temperature I use is 210 F. For the garlic, salt, pepper, etc. they belong in the gravy, and it has some or all of beef stock, beef base, the melted collagen, collagen bought dry in a package, results of browning beef in a skillet with fat, red wine, ….
Watch those cooking times, did mine at 270 and a half hour before estimated finish time and I had a medium done roast….. wanted medium rare. Also really didn’t like the rosemary in the rub. Rosemary is a very strong herb and it completely covers over the tyme. I like rosemary and it matches best with pork not this.
For a perfect cooked roast every time you should try rotisserie, only way I’ll cook a beef roast other than crockpot ,
Happy eatings!!!